How do you choose the right projector? We spent hours upon hours staring at screens, scouring user reviews, and putting some of the most popular models through a barrage of tests. Are you ready to nerd out about the finer points of audio/visual technology? If so, you've come to the right place for the ultimate competition of the top-ranked projectors on the market.
In this article, we first present a broad perspective and step-by-step decision guide that lays out a path to choosing your fancy light cannon. In case you want to delve into the minute details surrounding any one of those decisions, we then provide a nearly exhaustive description of all the projector-related jargon, technology, and specifications that you'd ever want to know about.
Choosing the Right Projector
Step 1: Do You Really Want a Projector?
This may seem an odd first step in selecting the right model, but it is the correct one. These products are flashy. It's easy to go to your friend's house, become enamored after watching your Hollywood crushes cavort about on a 100-inch screen, and dive headlong into creating your own home theater without considering all the pros and cons.
Projectors are great for business presentations. They can provide reliable, large images when installed in a conference room, and there are fairly portable options available for those traveling with their presentation rigs. Projectors are also a clear choice if you've got a nice dark-yet-cozy basement to turn into a mini-theater. Where issues can arise is if you want to use one to replace your TV. Many people use their TVs while doing other things that require light, periodically checking in on the news or TV shows while cooking dinner, or getting things together before heading off to work. While most projections will be able to hold their own with the lights on, there will be a noticeable drop in quality. Some may not mind this, others may find it annoying. Also, you can't walk in front of the screen without obstructing the image. This makes it more difficult to play Wii or follow along to yoga and workout videos. Finally, the lamps can take a few minutes to warm up, making them less than ideal for short viewing periods.
If you've made it through this section still thinking you've got a place in your home or office for a big screen, read on.
Step 2: Business or Pleasure? How Many Lumens Do I Need?
Whether you'll be projecting graph and text-heavy presentations in a lit room or movies in a dark one dictates how bright of a model you'll need. For presentations, you'll want something with at least 3000 lumens to make sure your slides can overcome the ambient light in the room. For projecting movies at home, a range of 1500-2000 lumens works well. If you're unsure about your needs, it's always better to have more lumens in the bank. However, if you know you're new purchase will become a dedicated movie-watching device, it's safe to settle for this 1500-2000 lumen range and look for the best image quality you can get.
Step 3: Choose a Resolution
Knowing the difference between 4K and UHD, or Ultra High Definition, is important. A true 4K projector has a resolution of 4096 x 2160, which is used by digital cinema projectors. UHD, on the other hand, refers to a resolution of 3840 x 2160, which is more common in the consumer world and also happens to be the resolution you get on TVs.
We suggest either getting a UDH model or one with a 1080p resolution. While it is still referred to as high definition, it is quickly becoming the standard. Having 1080p capability will make your rig a bit more future-proof, and you'll certainly notice a huge step up from other resolutions when watching movies.

If you don't want to spend the extra money for 1080p, you can get away with lower resolutions in some cases. Graph and text presentations can look ok as low as 800 x 600, especially if you don't sit close to the screen. However, this resolution is as low as you'd want to go. We found 800 x 600 to be the borderline where text was just beginning to become fuzzy in some spots. Also, if you're a quantity over quality person an 800 x 600 model will still give you a large picture, albeit relatively grainy.
Step 4: Consider Ease of Set-up
Setup is not so much an issue for home theaters, as you'll likely only have to do it once. But for those moving their projectors amongst different locales, ease of set-up is nearly as important as brightness. You'll want to make sure you get a model with keystone correction, and that it is easy to use. A larger zoom also helps for those that will be projecting in a number of different locations. The larger zoom leaves more throw ratios at your disposal, making it more likely you'll be able to get the right screen size in varying situations.

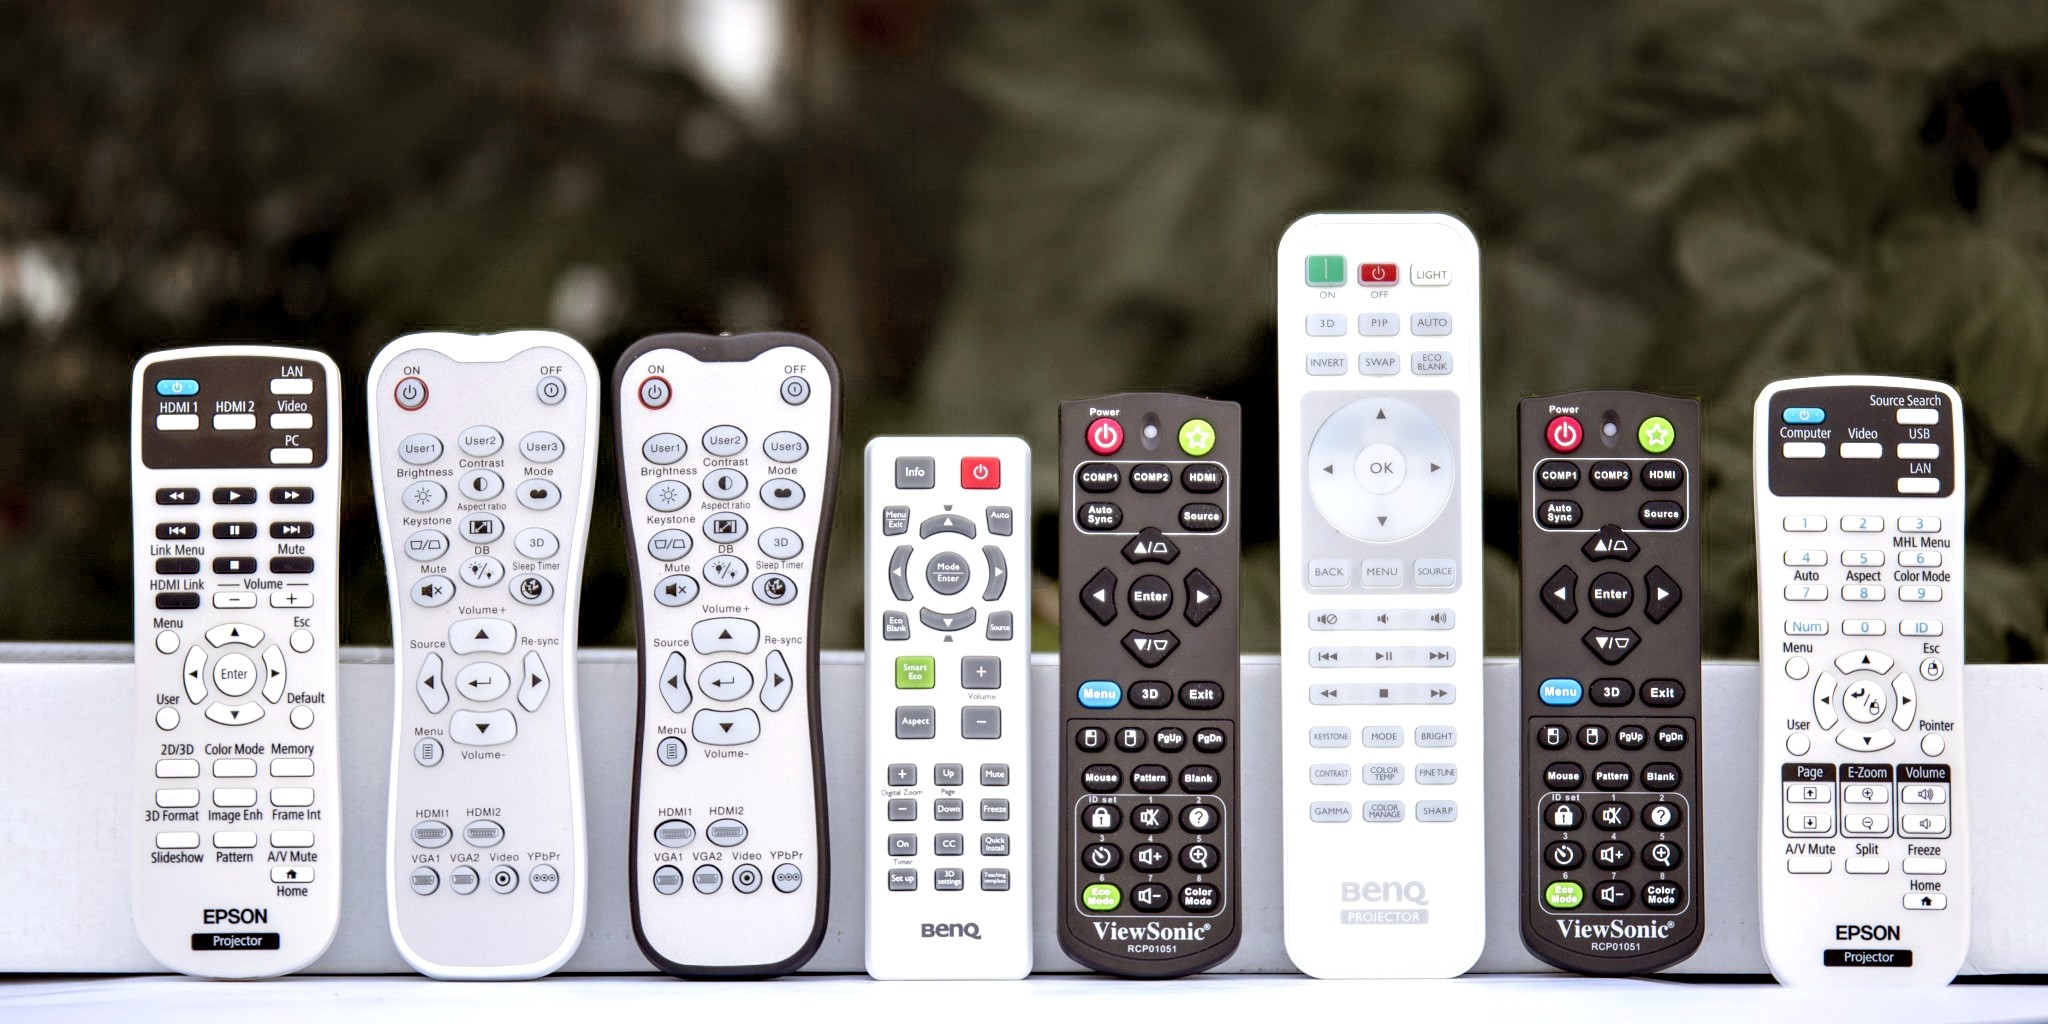
Step 5: How Nice Is the Remote?
Particularly in home theater situations, the remote control is the main interface you'll be interacting with. You want a remote that can intuitively guide you through color mode menus, adjust the volume, and change the input. Since you'll ideally be doing your viewing in the dark, buttons that light up are a real plus too.
Step 6: Consider Fan Noise
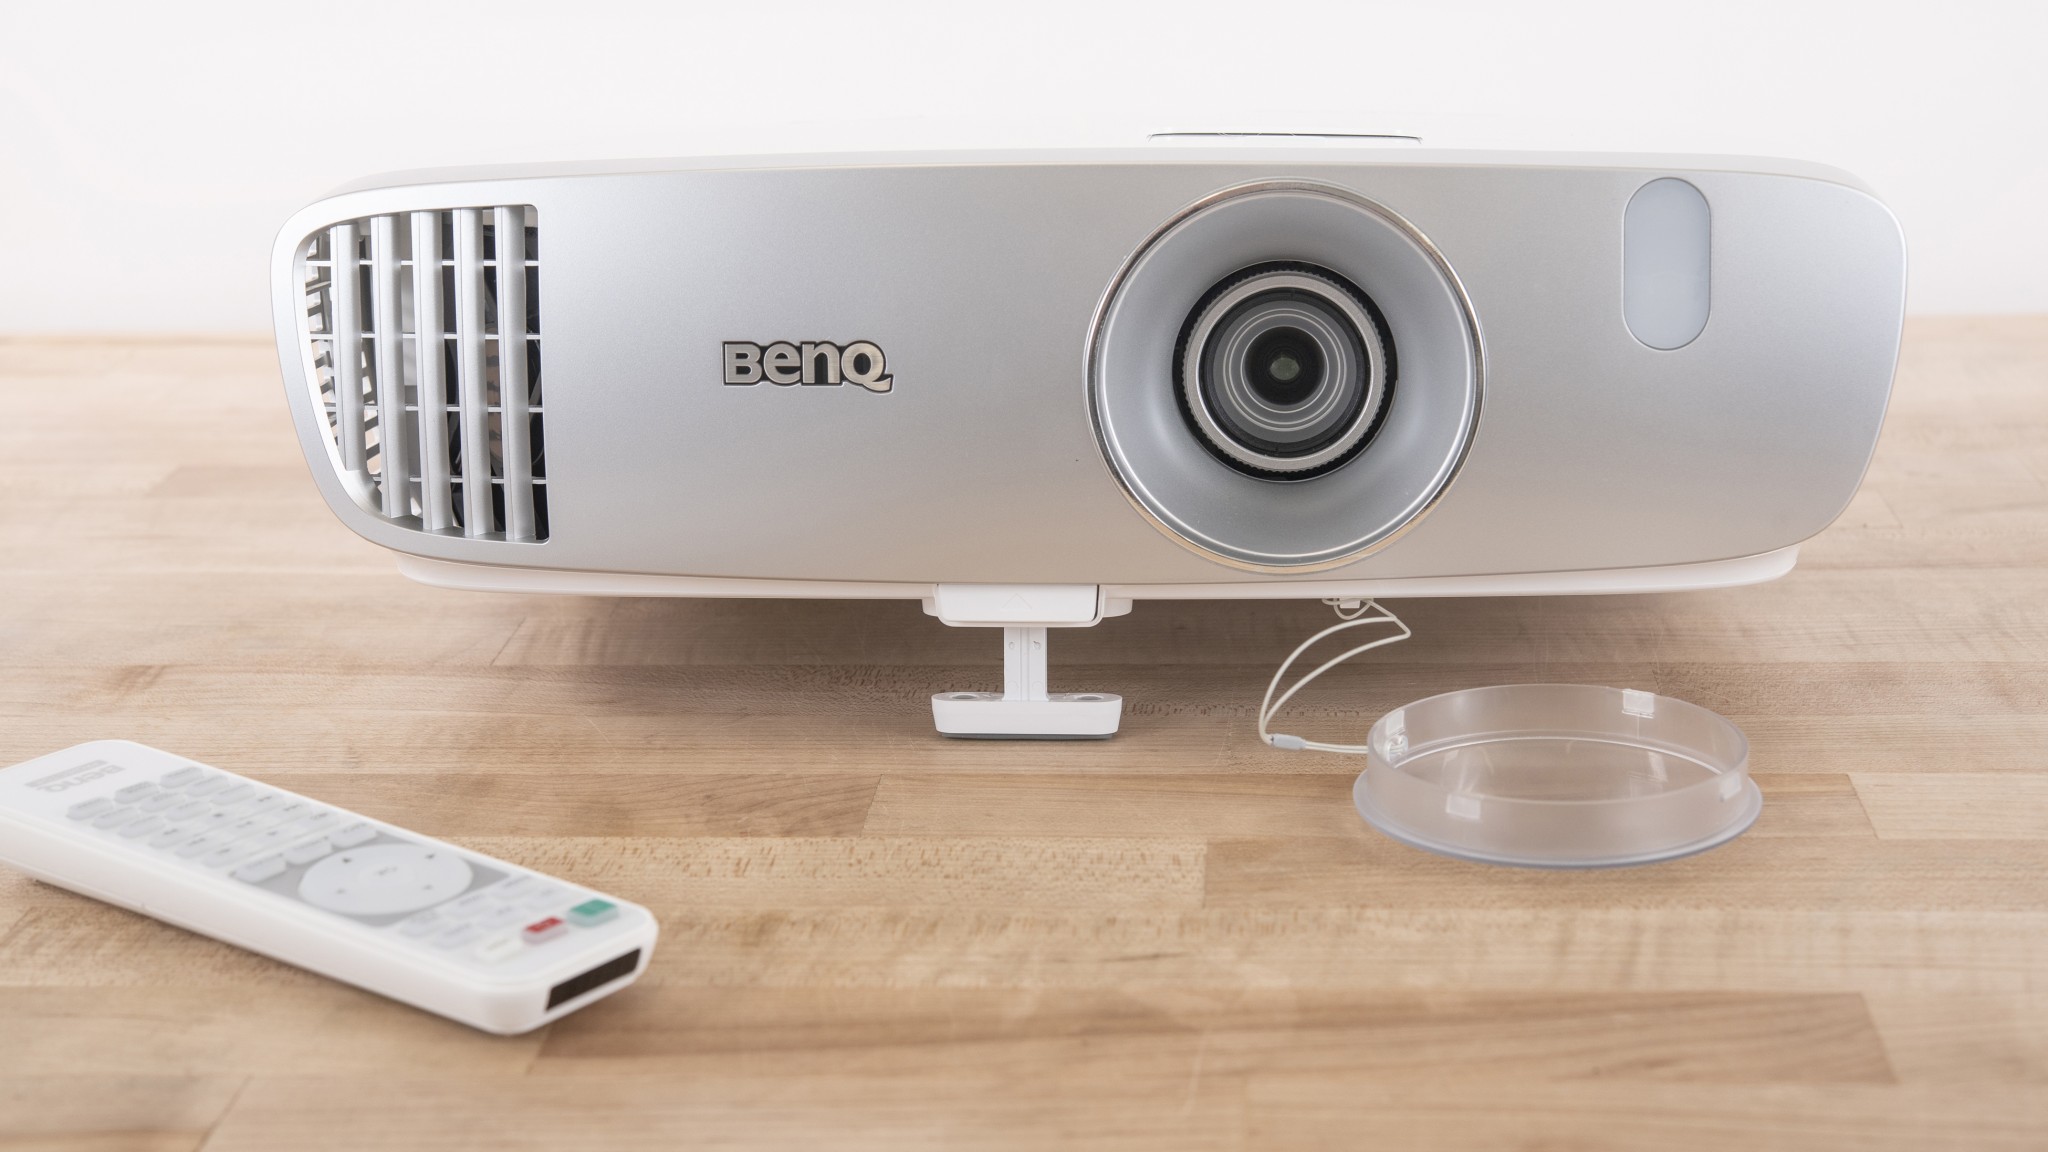
While no fan was able to completely ruin any particular viewing experience during our testing, some were a bit noisier than we would have liked. If you're particularly sensitive to noise and are constantly shushing people in the theater, we suggest you avoid the models that registered higher decibel readings found in our specs table. In our experience BenQ is a good brand for those who value a quiet fan, while those sensitive to noise may want to avoid ViewSonic models.
What Do All These Specifications Mean?
When researching projectors, you will undoubtedly find yourself wading through a mountain of specifications. The most prevalent are brightness, contrast ratio, and resolution. Understanding supported resolutions, throw ratios, aspect ratios, keystone correction, and lens shift will also make your decision easier.
Brightness
Brightness refers to the amount of light the projector can shoot through its lens and onto a screen. This is measured in ANSI lumens, generally referred to simply as lumens. Brightness is the most important decision to get right as a dim, washed-out image can render a projection essentially useless. You don't necessarily need to get the brightest model you can afford, but if you're not sure what your specific application will be, brighter is always a safer bet. Brighter models can be made dimmer (in fact, the cinema mode in most models does this automatically) but a lamp that is too dim cannot be made brighter.

For home theater applications, 1500 to 2000 lumens work well enough with no ambient light. This is plenty of brightness to project a sharp image on a 100-inch screen in a dark room but is dim enough to still produce dark blacks. Darker blacks make images feel vibrant, lending a cinematic quality to your viewing experience and highlighting that twinkle in Elliot Page's eyes. As mentioned before, most brighter options have preset modes that lower their brightness into this movie-watching sweet spot. You'll need a brighter model if you plan to project in more well-lit situations, such as a conference room. Otherwise, the ambient light will wash out the image, leaving everyone squinting at your presentation. In these situations, 3000 to 4500 lumens will suffice. You'll want to trend towards the brighter side if your conference room is particularly bright or has large windows.
You can go brighter, but it will be much more expensive and is really only required for specialty applications. For example, most lecture halls use models with more than 5000 lumens, and movie theater models throw around 20,000 lumens.
Contrast Ratio
The term contrast ratio refers to the difference in brightness between the darkest black a model can produce compared to the brightest white it can produce. It is most often displayed as a ratio, such as 20,000:1. This indicates that the brightest white is 20,000 times brighter than the darkest black. The mid-tones also play a role in how detailed an image is.
Contrast ratio is usually listed towards the top of the spec sheet and is something many people gravitate toward in their purchase decision. It makes sense, as contrast ratio is seemingly the best numerical indicator of image quality. Dark blacks juxtaposed with bright whites will produce rich images and make everything from the Hollywood leading man brooding in a dark room to summer blockbuster explosions pop.
While this is true, there are so many factors that affect the actual contrast ratio that manufacturer claims are not particularly useful, and certainly not comparable across brands. First off, there are two types of contrast, static contrast, and dynamic contrast. Static contrast, which is sometimes called native contrast, refers to the contrast that can be produced in a single image or single frame from a movie. Dynamic contrast refers to the contrast that can be produced between different frames from a video. Many models adjust their lamps based on the average brightness of a particular scene. The lamps will dim for dark scenes and then ramp back up for lighter scenes. Although most models utilize some form of this dynamic contrast, few if any spec sheets specify if they are referring to static or dynamic contrast. Also, ambient light can greatly affect the perceived contrast ratio. Brighter lamps will inevitably appear to have better contrast in lit rooms, simply because they can overcome the ambient light more than dimmer models. Even in a perfectly dark room, your surroundings can affect the contrast you actually see. Light from the projector can bounce off objects in the room, in essence creating its own ambient light and altering images on the screen. Finally, there is no specific standard for measuring contrast ratio, so as consumers, we have no guarantee that everyone is doing it the same way.
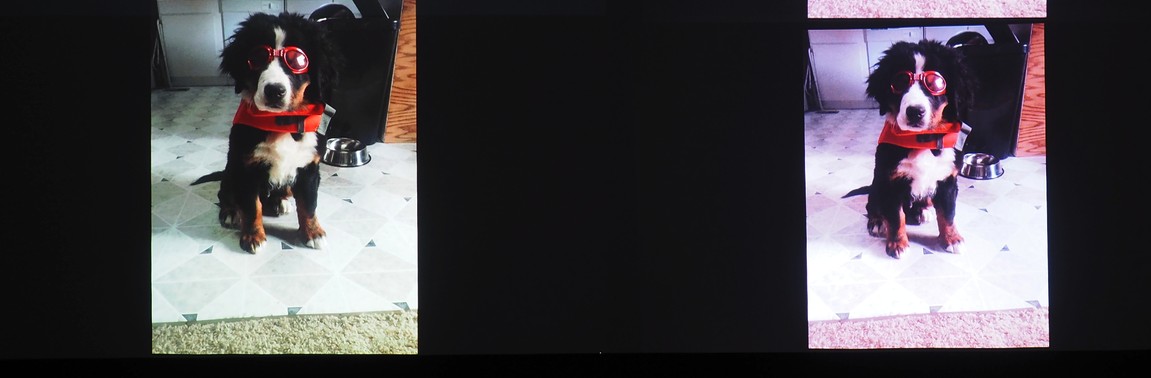
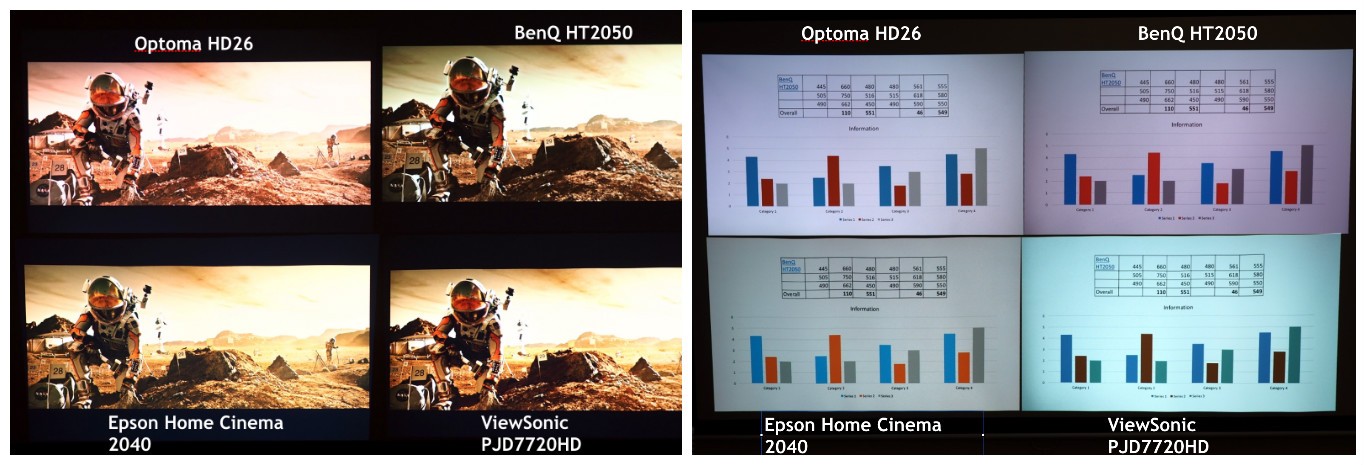
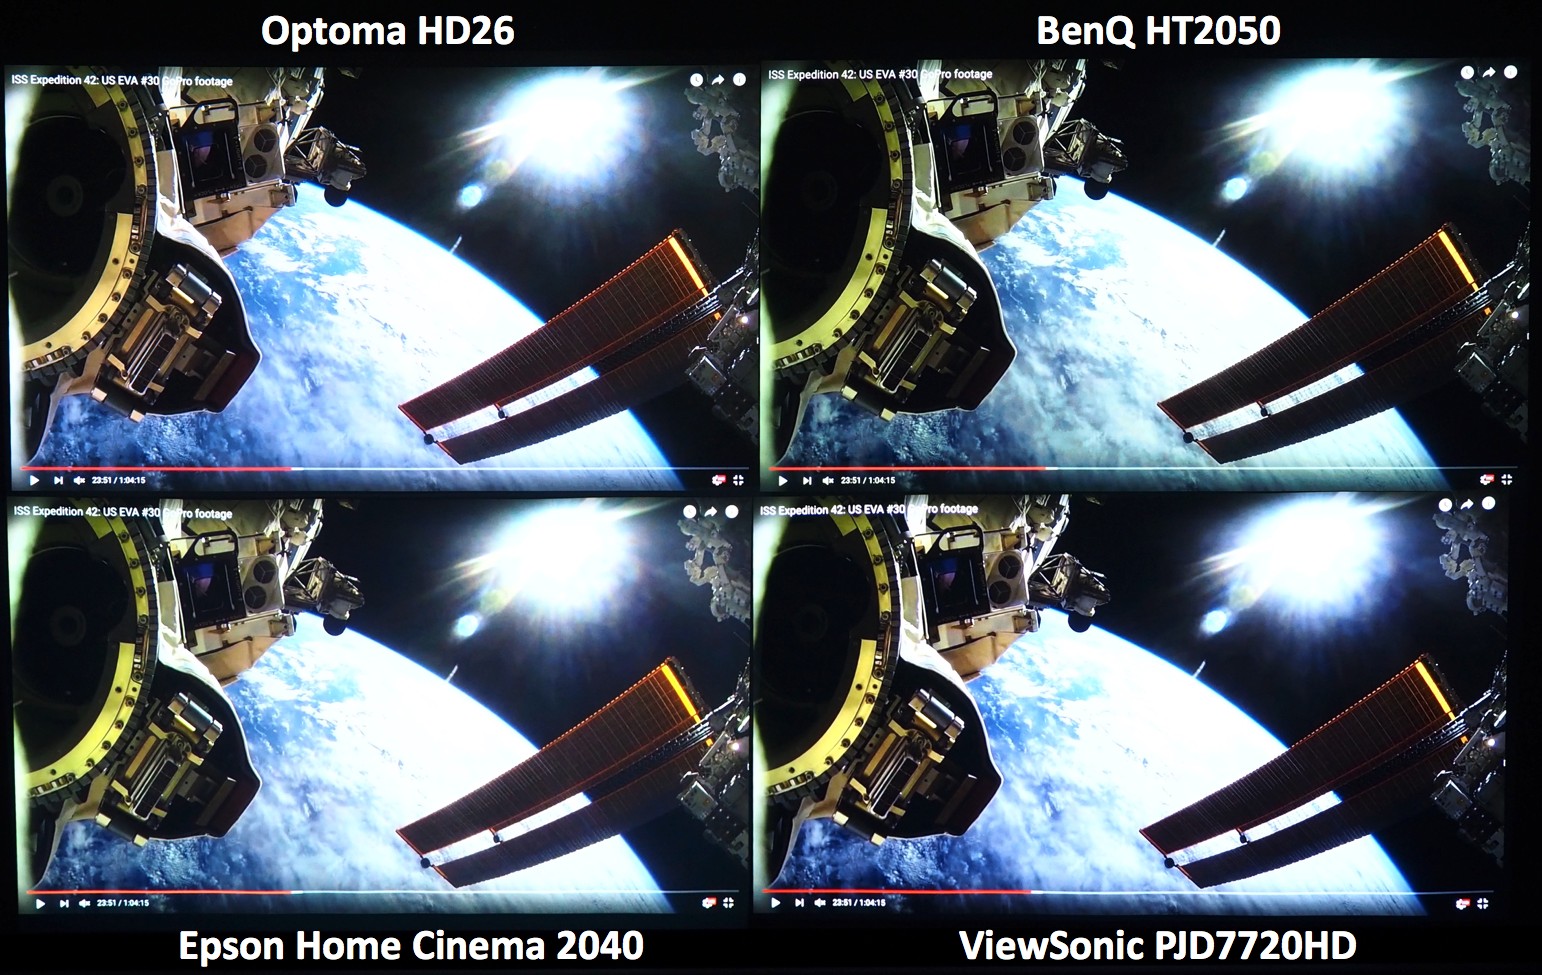
Considering this, we recommend you don't pay attention to contrast ratio statistics. We rated image quality by viewing still and moving images on projectors side by side in the same room. This is a much better representation of the quality you'll experience from each model than having a sensor produce a number by staring at a white and black checkerboard.
Resolution
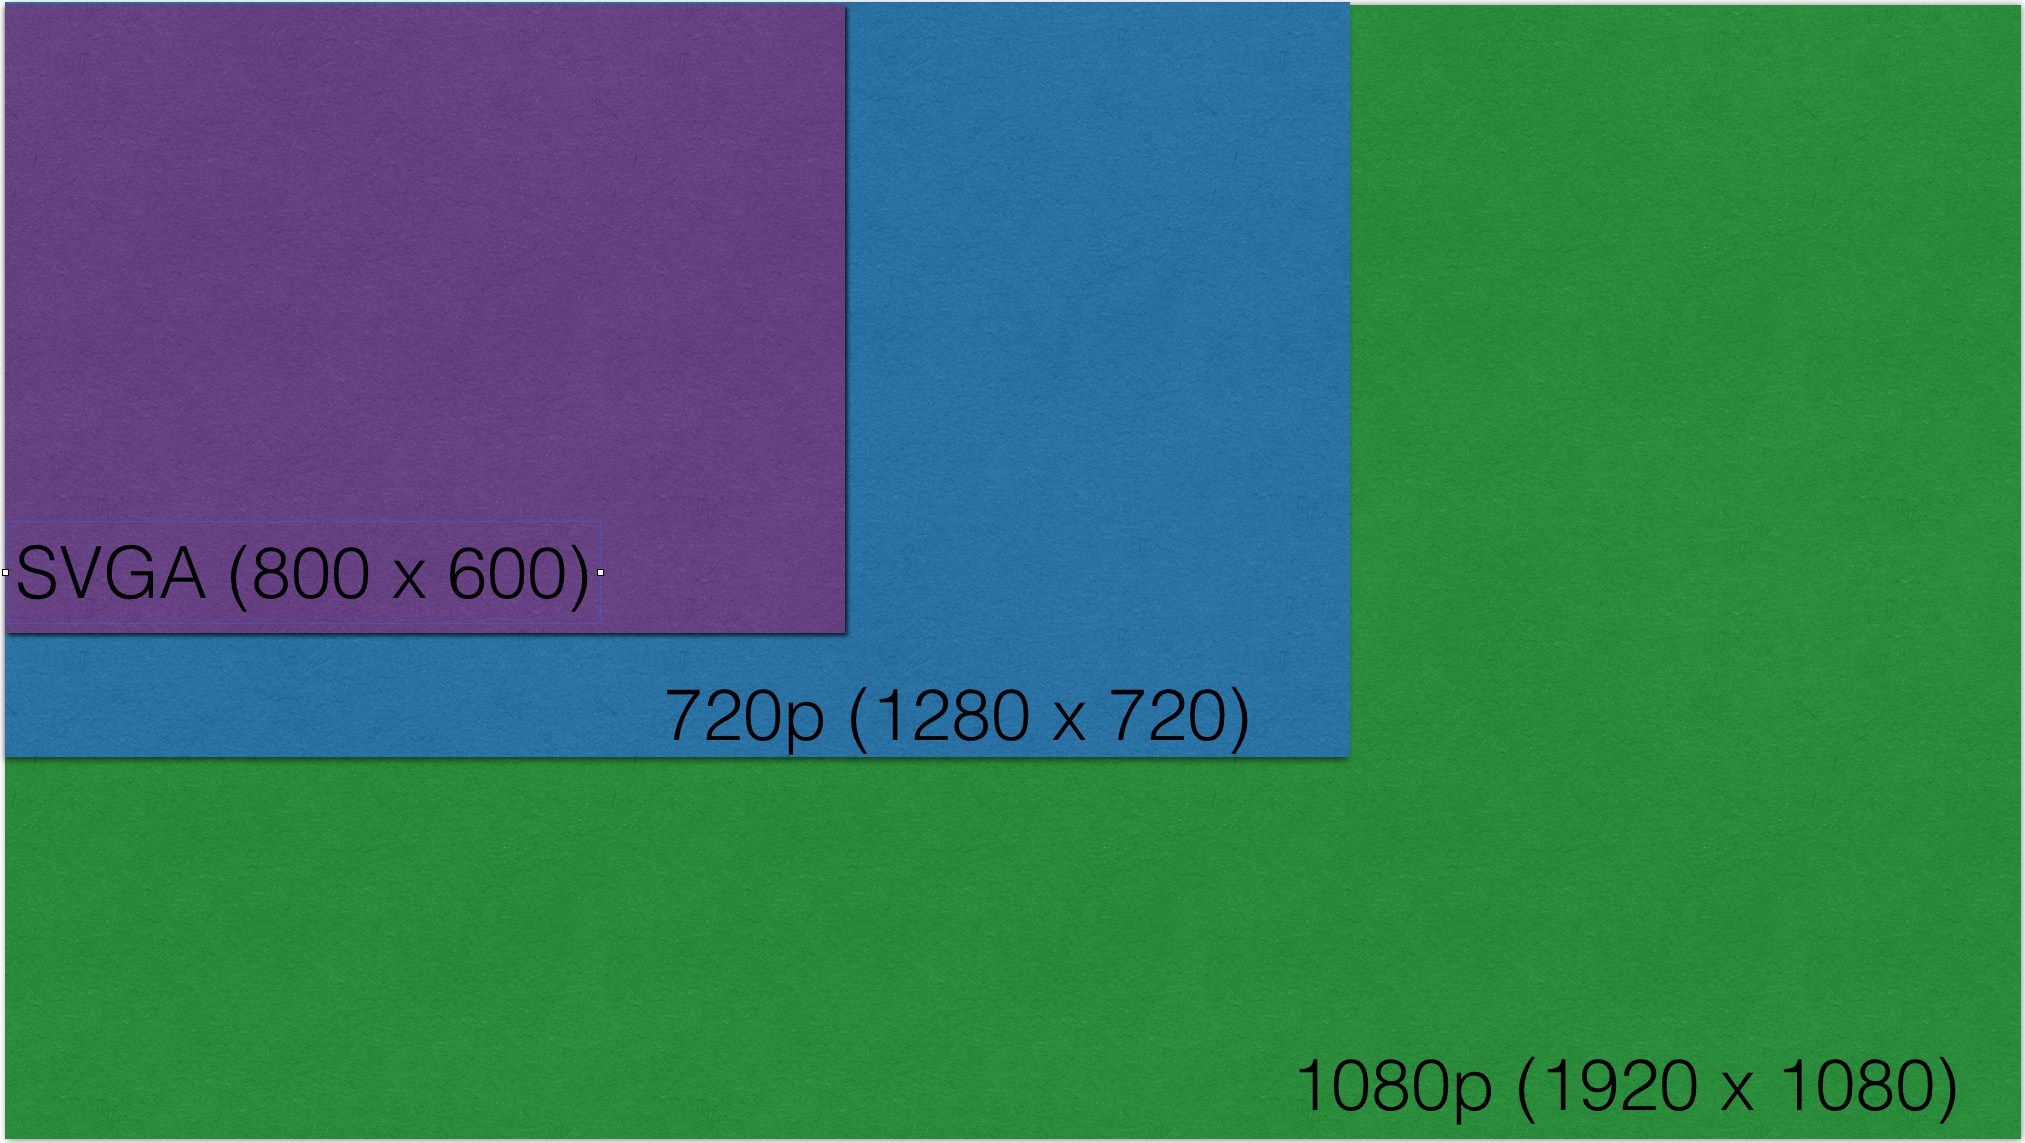
In this digital age, most people are aware of the almighty pixel, the tiny squares in digital images that display a single color. The more of them that are contained in an image, the higher resolution that image will be. So the resolution is essentially measured by the number of pixels that are contained in an image. The confusing part is how resolutions are reported. Thanks to this age of marketing and branding, varying resolutions are referred to with different, seemingly unrelated numbers.
The simplest way to display resolution is to report the width and height of an image measured in pixels. This is often done for lower resolution. For example, a model with 800 x 600 resolution produces an image that is 800 pixels wide and 600 pixels tall. This 800 x 600 resolution is common and often referred to as SVGA. A slight step up is the less common XGA and WXGA resolutions, which are 1024 x 768 and 1280 x 800, respectively. With the advent of high definition (HD) these dimension measurements suddenly lacked the required sex appeal, so we were introduced to 720p and 1080p. These numbers actually refer to the height of an image in pixels; 720p is 1280 x 720 and 1080p is 1920 x 1080. The 'p' refers to how the image is processed, is not particularly important, and makes it sound way cooler. Both of these resolutions are considered HD, but obviously, 1080p is a bit higher resolution. Finally, we have 4K, which is often referred to as ultra high definition, or UHD, but the two are not synonymous. 4K corresponds to a 3840 x 2160 resolution and derives its name from the fact that it has four times the number of pixels as 1080p, and that it is close to 4000 pixels wide. 4K is a professional production and cinema standard, while UHD, ultra-high definition, is a broadcast standard and consumer display.
In general, the lower resolutions are only suitable for things like PowerPoint presentations that don't contain many high-resolution images. Even in that situation, a resolution of 800 x 600 is the absolute minimum. At this resolution, we found some instances where text was just starting to blur and become difficult to read. For watching movies you will want 1080p as this has quickly become the standard resolution for large screens, with 720p relegated to smartphones and tablets. 4K is still a fairly new technology, so 4K models are quite expensive (cheaper options are around $8000), and 4K content is somewhat limited. However, Netflix has released a number of movies, and TV shows in 4K (including Breaking Bad), and iPhones are capable of capturing 4K video, so it seems 4K is set to become the new standard. But we would wait for the prices to come down a bit before adopting it for ourselves.
Native Resolution vs. Supported Resolution
Native resolution is the resolution a model is able to display, while supported resolution is the highest resolution signal a model will be able to produce an image from. For example, take a model with a native resolution of 800 x 600 and a supported resolution of 1080p. This model can receive a 1080p signal from a Blu-ray player and laptop and project the image, but the image will be scaled down to a resolution of 800 x 600.
We suggest choosing a model that at least supports 1080p as it is becoming the standard for more and more devices — so not being able to support it severely limits what can be projected. Additionally, supporting 1080p means the inclusion of an HDMI input port, which is also becoming the standard video/audio input.
Aspect Ratio
Aspect ratio is the ratio of the width to the height of an image. Lower resolution models, such as those with a native 800 x 600 resolution, have a 4:3 aspect ratio. All high-definition resolutions use a widescreen 16:9 ratio. This ratio lends to a much more cinematic experience. In theaters, most movies use aspect ratios of 1.85:1 (which works out to just a smidge wider than 16:9) or 2.39:1 (which works out to about 21:9). Wes Anderson's Grand Budapest Hotel notably uses three different aspect ratios throughout the film, just to keep you on your toes. Also, most computer monitors and laptops have moved to 16:9.
Most models can project in multiple aspect ratios, but their native resolution dictates what ratio they are optimized for. For example, an 800 x 600 model is optimized for 4:3 and a 1080p model is optimized for 16:9. Projecting a 16:9 image on a 4:3 model will result in a loss of resolution as it essentially truncates the image vertically. So you end up with an image that uses the full width of pixels but has black spaces above and below the image, which are essentially wasted pixels. Generally, you don't lose resolution when projecting a 4:3 image on a 16:9 model, though you do get a smaller image. This is because most 16:9 models have 1080p resolution and thus plenty of pixels to display the full 800 x 600 resolution of most 4:3 images, but can't pull it out to fit the entire screen without cutting the top and bottom off.
The bottom line is 16:9 is quickly becoming the new standard and offers more versatility than 4:3. So get a model with a native resolution that has a 16:9 ratio, which would be a 720p or 1080p model, if you can.
Throw Ratio
Throw ratio is the ratio of the distance a projector is from the screen to the width of the image that is projected. For example, a model with a throw ratio of 1.5:1 produces a 1-foot wide image when placed 1.5 feet from the screen (which is comically close but let's keep the math easy).
Often you will see throw ratios with two numbers at the beginning, such as 1.3-1.7:1. This is because most models have an optical zoom that allows you to zoom the image in and out, essentially providing you with a range of throw ratios. Larger zooms give you more versatility and can be helpful for those that will be using their projector in a number of different settings. Zoom is often referred to as a separate specification, such as 1.1x manual zoom, but it is much more useful to think of it in terms of the range of throw ratios it offers.
Throw ratio is an important consideration as it tells you where in your room you will need to place your projector to achieve the image size you want, or how big of an image you can get with it placed in your desired location. Using a handy throw ratio calculating too can help you figure out what your needs are.
Keystone Correction
Keystoning refers to the trapezoidal shape an image takes when the lens is not perfectly parallel to the screen. Most often this happens in the vertical plane as the projector is usually mounted high on a ceiling or sitting low on a table, and is then tilted to face the screen. It can happen in the horizontal plane as well, but usually, it is much easier to get the lens parallel to the screen horizontally.
Most models offer a means of correcting keystoning, allowing you to incrementally adjust the picture to get it as close to a perfect rectangle as possible. All of the models we tested are able to correct for vertical keystoning — some even do it automatically — and some can also correct for horizontal keystoning. Ease of correcting keystoning is critical if you will be moving your projector between different rooms.
The only things you need to consider with keystone correction is whether a model is capable of it and how easy it is to use. You definitely want a model with vertical keystone correction. Horizontal correction is nice, but usually not necessary as it can be adjusted by nudging the projector to one side or the other. Keystone correction is often listed in terms of degrees, such as vertical ±30˚. You don't need to worry about this range as you will not want to use its outer limits. Keystone correction is done digitally rather than optically (think zooming in with your smartphone's camera vs. using an actual zoom lens). So the more you use keystone correction the more the image must be digitally reshaped and altered, resulting in a progressively greater loss in resolution. It is best to position the projector as optimally as possible and then make small keystone corrections.
Lens Shift
If you're planning on putting your projector on a permanent ceiling mount or shelf, then lens shift can be a lifesaver. As the name suggests, lens shift moves the projected image by moving the actual lens, resulting in zero loss of resolution. Most models that offer lens shift can move the image vertically or horizontally. This is incredibly useful if you've got your mount set and your lens parallel to the screen but find that the bottom of the projected image is a few inches lower than the bottom of your screen. Instead of adjusting the entire mount or having to build a shelf that is a few inches taller, you can just use lens shift to move the image up. Some models also have variable lens shift that can adjust the lens diagonally, allowing you to place the projector off-center from the screen and still get a properly proportioned, full resolution image.
When researching projectors you will likely find many threads arguing about whether lens shift can be used to correct for keystoning. This is somewhat of a quibble in terminology. For keystoning to be present the lens must not be aligned with the screen. Using lens shift in this situation will not correct the keystoning problem. What lens shift can do is allow you to more easily move the projector so that the lens is aligned with the screen, and then move the image up or down to better accommodate that new position. So, technically, lens shift can help prevent or avoid a keystoning situation, but cannot correct keystoning on its own.
Fan Noise
These devices produce a lot of heat and require fans to keep cool. Fan noise can become incredibly distracting if it's noticeable. Many manufacturers report the fan noise in decibels. However, fans turn on and off, and ramp up the intensity, depending on how hot the unit gets. It's impossible to tell whether the manufacturer-purported fan noise is the maximal noise or the average noise. We suggest you look at our fan noise scores. We evaluated noise based on the loudest noise produced, how often it was produced, and how annoying we perceived it to be.
Built-in Speakers
Most models, and all the ones we tested, have some sort of built-in speakers. In our experience, they all fall somewhere between acceptable and decent in terms of sound quality. If you're the kind of person who is satisfied by the audio from a standard television set, you'll probably be satisfied with built-in speakers. However, if you're already investing in a projector and screen to bring the theater experience into your home, a good set of external speakers (like a sound bar setup) is the obvious next step in making that experience complete (apart from the popcorn popper, of course).

Color Modes
Most models allow almost endless customization of color settings. In fact, you can spend a few hundred dollars to have a professional come in and optimize color settings to the specific conditions of your home theater. However, it is much easier, and cheaper, to rely on the various preset color settings offered on each model. These are generally referred to as color modes. Though different manufacturers use different names, these color modes fall into three main categories; dynamic, movie, and presentation.
Dynamic
Dynamic modes are also often referred to as sport or vivid. These modes try to optimize the settings so that fast-moving images will look good in a well-lit room. Often they do so at the expense of color accuracy but produce poppier images. Think of a group of friends watching the big game with enough ambient light to still find the nachos or the same group of friends playing a video game with enough light to find the right person to yell at for screen peeking.
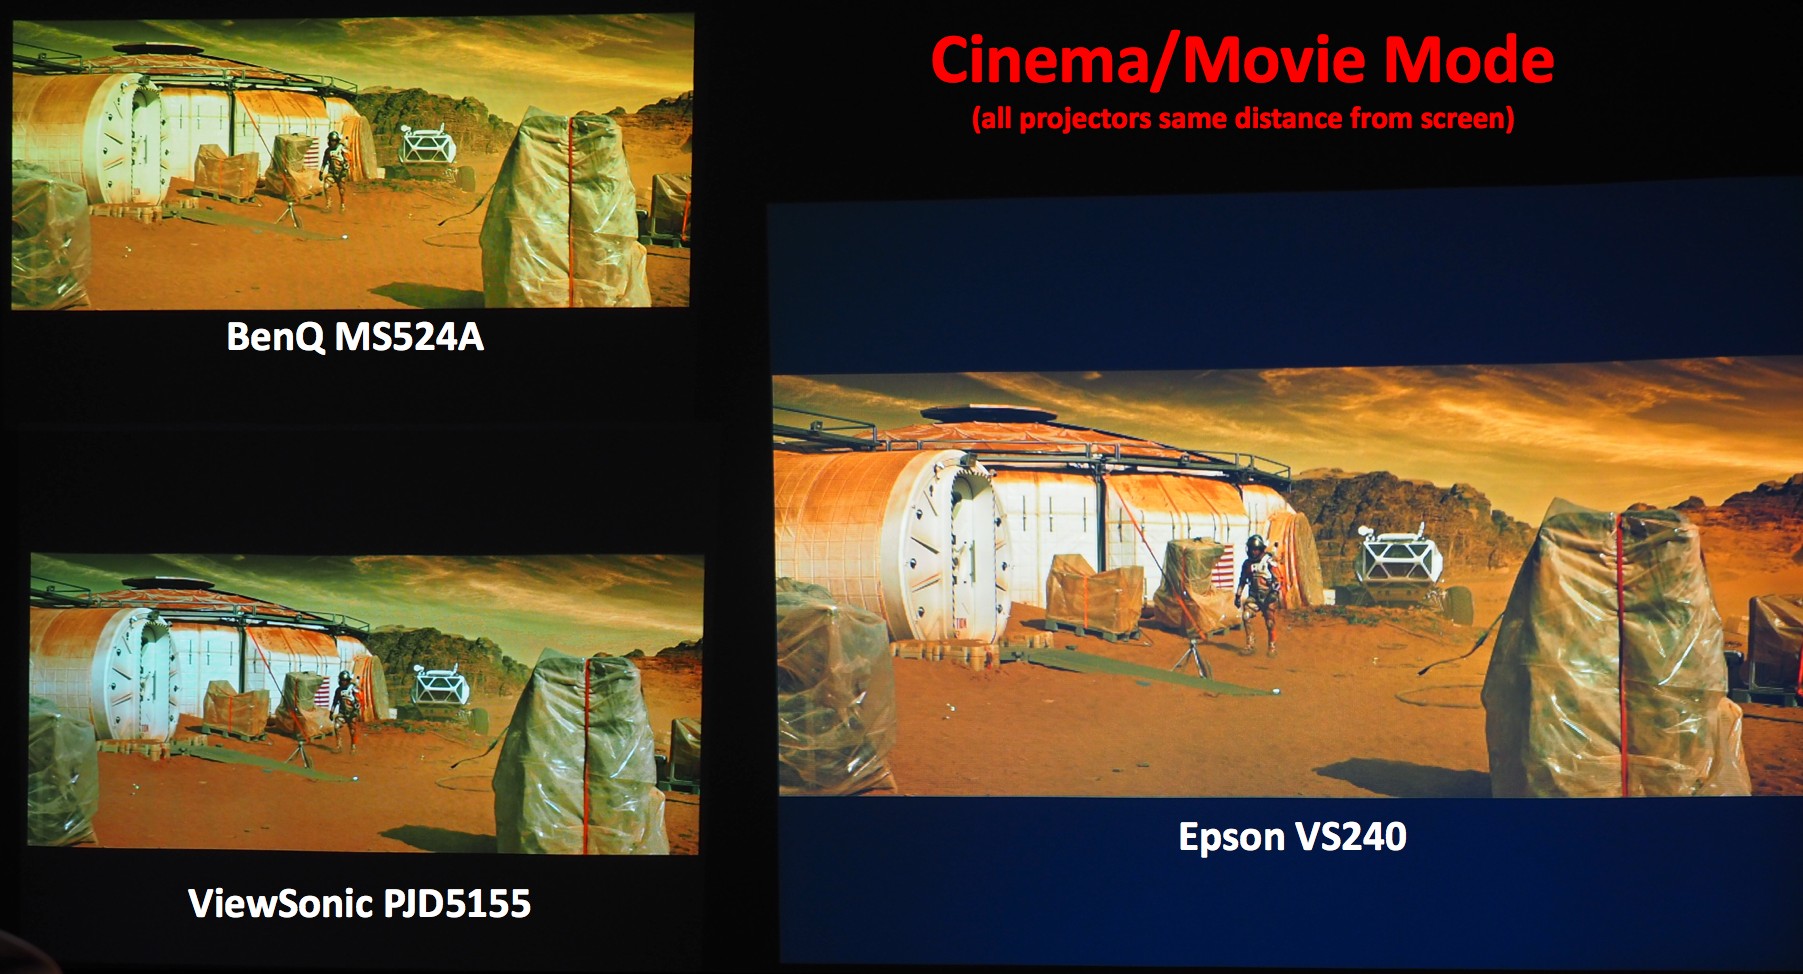
Cinema
Cinema or movie modes do their best to recreate a theater experience and are optimized for dark rooms. Often they use a warmer color setting, resulting in richer reds. This can sometimes look a bit too red at first glance, but generally is actually more accurate, and looks better once your brain adjusts. These modes often also dim the lamp in order to achieve darker, truer blacks that make other colors look more vivid.
Presentation
Presentation modes utilize the full brightness of the lamp to ensure the ambient light found in most conference rooms won't wash out hard-to-read text and graphs. This brightness means lighter blacks and thus somewhat reduces the vividness of photos and videos, but makes sure they can still be seen in a bright room.
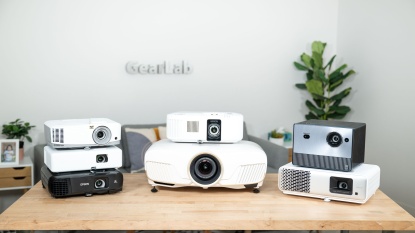
Types of Projectors
From a broad scale and functional perspective, the best projectors generally fall into a few different categories; the familiar designs that can handle the most common use scenarios and a few specialized subcategories for more unique situations.
Multimedia
This generic term captures the vast majority of the products available. These are the models that you see in classrooms, boardrooms, conference rooms, and many home theater rigs. They are small enough to be considered portable but certainly aren't a throw-it-in-the-bag-and-forget-about-it size. They can handle everything from movies to spreadsheets and can satisfy the needs of the lion's share of consumers. All of the models we reviewed fall into this category.
Dedicated Home Theater
While these models function similarly to multimedia models, they do so with mind-boggling resolution and clarity. In fact, they may make you wonder if you need Lasik so the real world will look as good. This increased resolution comes with an increased price tag and increased size. These models are not in the least bit portable, most clocking in at over 30 pounds, and are only suitable for permanent mounts. All current 4K models fall into this category.
Pico
Pico models are incredibly small (often not much bigger than a couple of stacked DVD cases) and are efficient enough to run off of an internal battery. This makes them imminently portable and able to turn any dark room, campsite, or backyard barbeque into a mini theater. These models achieve their minuscule stature and efficiency by using relatively dim LED lamps, so they struggle with ambient light and make some sacrifices in image quality.
Short Throw
Short throw models are designed to project large images from a short distance. While a common throw ratio for a multimedia model is 1.5:1, short-throw models can get as low as 0.4:1. That means the short-throw model can project a 5-foot image from 1.5 feet away, while the multimedia model would have to be 7.5 feet away to achieve the same image size. These models are ideal for small classrooms or other situations where space is limited, but they lack the adjustability of more standard models and are thus much more difficult to set up correctly. Some also distort the image heavily around the perimeter.
Projection Technologies
Outside of general use categories, models are defined by the technology that they use to create an image. There are a number of different technologies, but DLP and LCD are the most common, with LCoS continuing to occupy larger portions of the high-end market. All of these technologies can adequately perform in projecting anything from spreadsheets to motion pictures. When viewed side by side they do have some slight, but noticeable, differences in performance.
Digital Light Processing (DLP)
DLP is probably the most common projection technology. The 'D' in DLP comes from its use of a digital chip that has thousands of tiny mirrors, each representing a single pixel. These mirrors can move to direct light into the lens, turning the pixel on, or to direct light away from the lens, turning the pixel off. The light that hits this mirror chip first passes through a color wheel. The color wheel is usually comprised of red, blue, and green filters, and spins at a high rate to shine these colors on the mirror chip in quick succession. The mirrors then flick back and forth thousands of times a second to obtain just the right color hue for each pixel. Most models use a single chip and color wheel, but some high-end models use three, one for each of the primary colors red, blue, and green.
If all of this sounds complicated, it's because it is. The engineering required to make all of those moving parts work seamlessly makes some DLP models more expensive than their LCD counterparts. It also can produce better images. DLP models tend to have truer blacks and better contrast than LCD models, creating more vivid and immersive images. For this reason, alone many home theater enthusiasts swear by DLP. The colors produced by this technology also do not fade over time, giving you consistent performance for the lifetime of the product.
DLP has some disadvantages. It tends to produce more heat than other technologies, requiring that the cooling fan operate more often. This doesn't matter if the fan is quiet, but can become quite annoying if the fan produces a noticeable drone. Also, single-chip models sometimes show flashes of red, green, and blue when light areas quickly move across dark ones on the screen. This is due to the color wheel not spinning fast enough to deal with the motion. Most models have upgraded to faster color wheels to avoid this. We couldn't get any of the DLP models we tested to produce a rainbow effect.
Liquid Crystal Display (LCD)
LCD models use an array of transparent versions of the LCD screens found on many televisions. To produce an image white light is split into red, green, and blue using a series of dichroic mirrors. Each of the three colors is then passed through three different transparent LCD screens. Each one of these screens produces an image. This produces three different colored images, which are then combined in a prism to create one full-color image.
This system has fewer moving parts than DLP, which creates less heat and requires less use of noisy fans. In some instances, it can create slightly sharper text than DLP, and often is more inexpensive. However, LCD models have a number of relative drawbacks. Pixelation tends to be more apparent when viewed close up. Also, the LCD panels can dull and acquire dead pixels over time, leading to a degradation in image quality that you don't see with DLP. LCD does tend to have better color saturation than DLP. This means LCD pixels can produce brighter, richer colors in isolation, but when viewed in the context of the rest of the pixels the darker blacks and better contrast of DLP still produces a better image overall. While LCD has been improving in recent years, for the time being, DLP is a better choice, especially for home theater use.

Liquid Crystal on Silicon (LCoS)
LCoS essentially combines DLP and LCD technology, capitalizing on the richer colors of LCD without sacrificing the superiors blacks and contrast of DLP. White light in an LCoS model starts out the same way as in an LCD model; being split into red, green, and blue by dichroic mirrors. Those three beams of light each hit their own dedicated mirror chip, much like in a DLP model. However, these mirrors don't move to turn pixels on and off, instead, each one has an LCD film over it that either blocks or permits light through. The reflected light from those three chips are then combined in a prism to create the final image.
LCoS technology leads in almost all image quality metrics. Its major downside is price. You'd be hard-pressed to find a model that lists for less than $2000, and most are much more expensive than that. Their price has fallen steadily in the past few years, so it may not be long before they become the standard. However, at their current prices, no LCoS models made our selection cut.